Obstacle Avoidance Robot
By Blake Iwaisako
Description:
Build a rover vehicle that drives straight until it encounters an object that it must detect and drive away from (Like a small Roomba!). This project can be made using a microcontroller of your choice, in this example I will use an Arduino Uno combined with an Adafruit motor shield. This document will also be covering the basics of ultrasonic sensors as it is used for detecting objects within a specified distance.
Components Used:
- Ultrasonic Sensor (HC-SR04)
- 4 x DC Gearbox Motors
- Arduino Uno
- Adafruit Motor Shield v2
- SG90 Servo Motor
- 9 Volt Battery
- Jump Wires
Process:
Design Chassis in Solidworks to be 3D printed
- Create assembly complete with housing for all electronic components
Learn how to drive the motors and use the sweeping ultrasonic function
Assemble and test robot
- Fine-tune motors to drive in a straight line
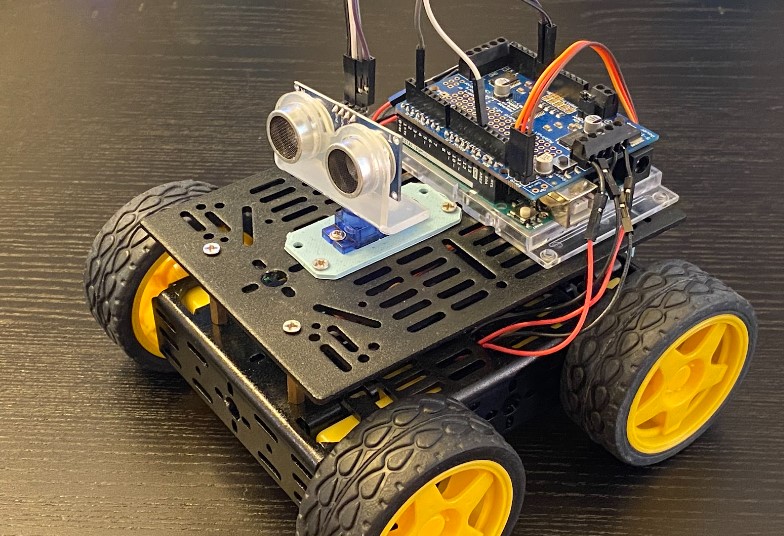
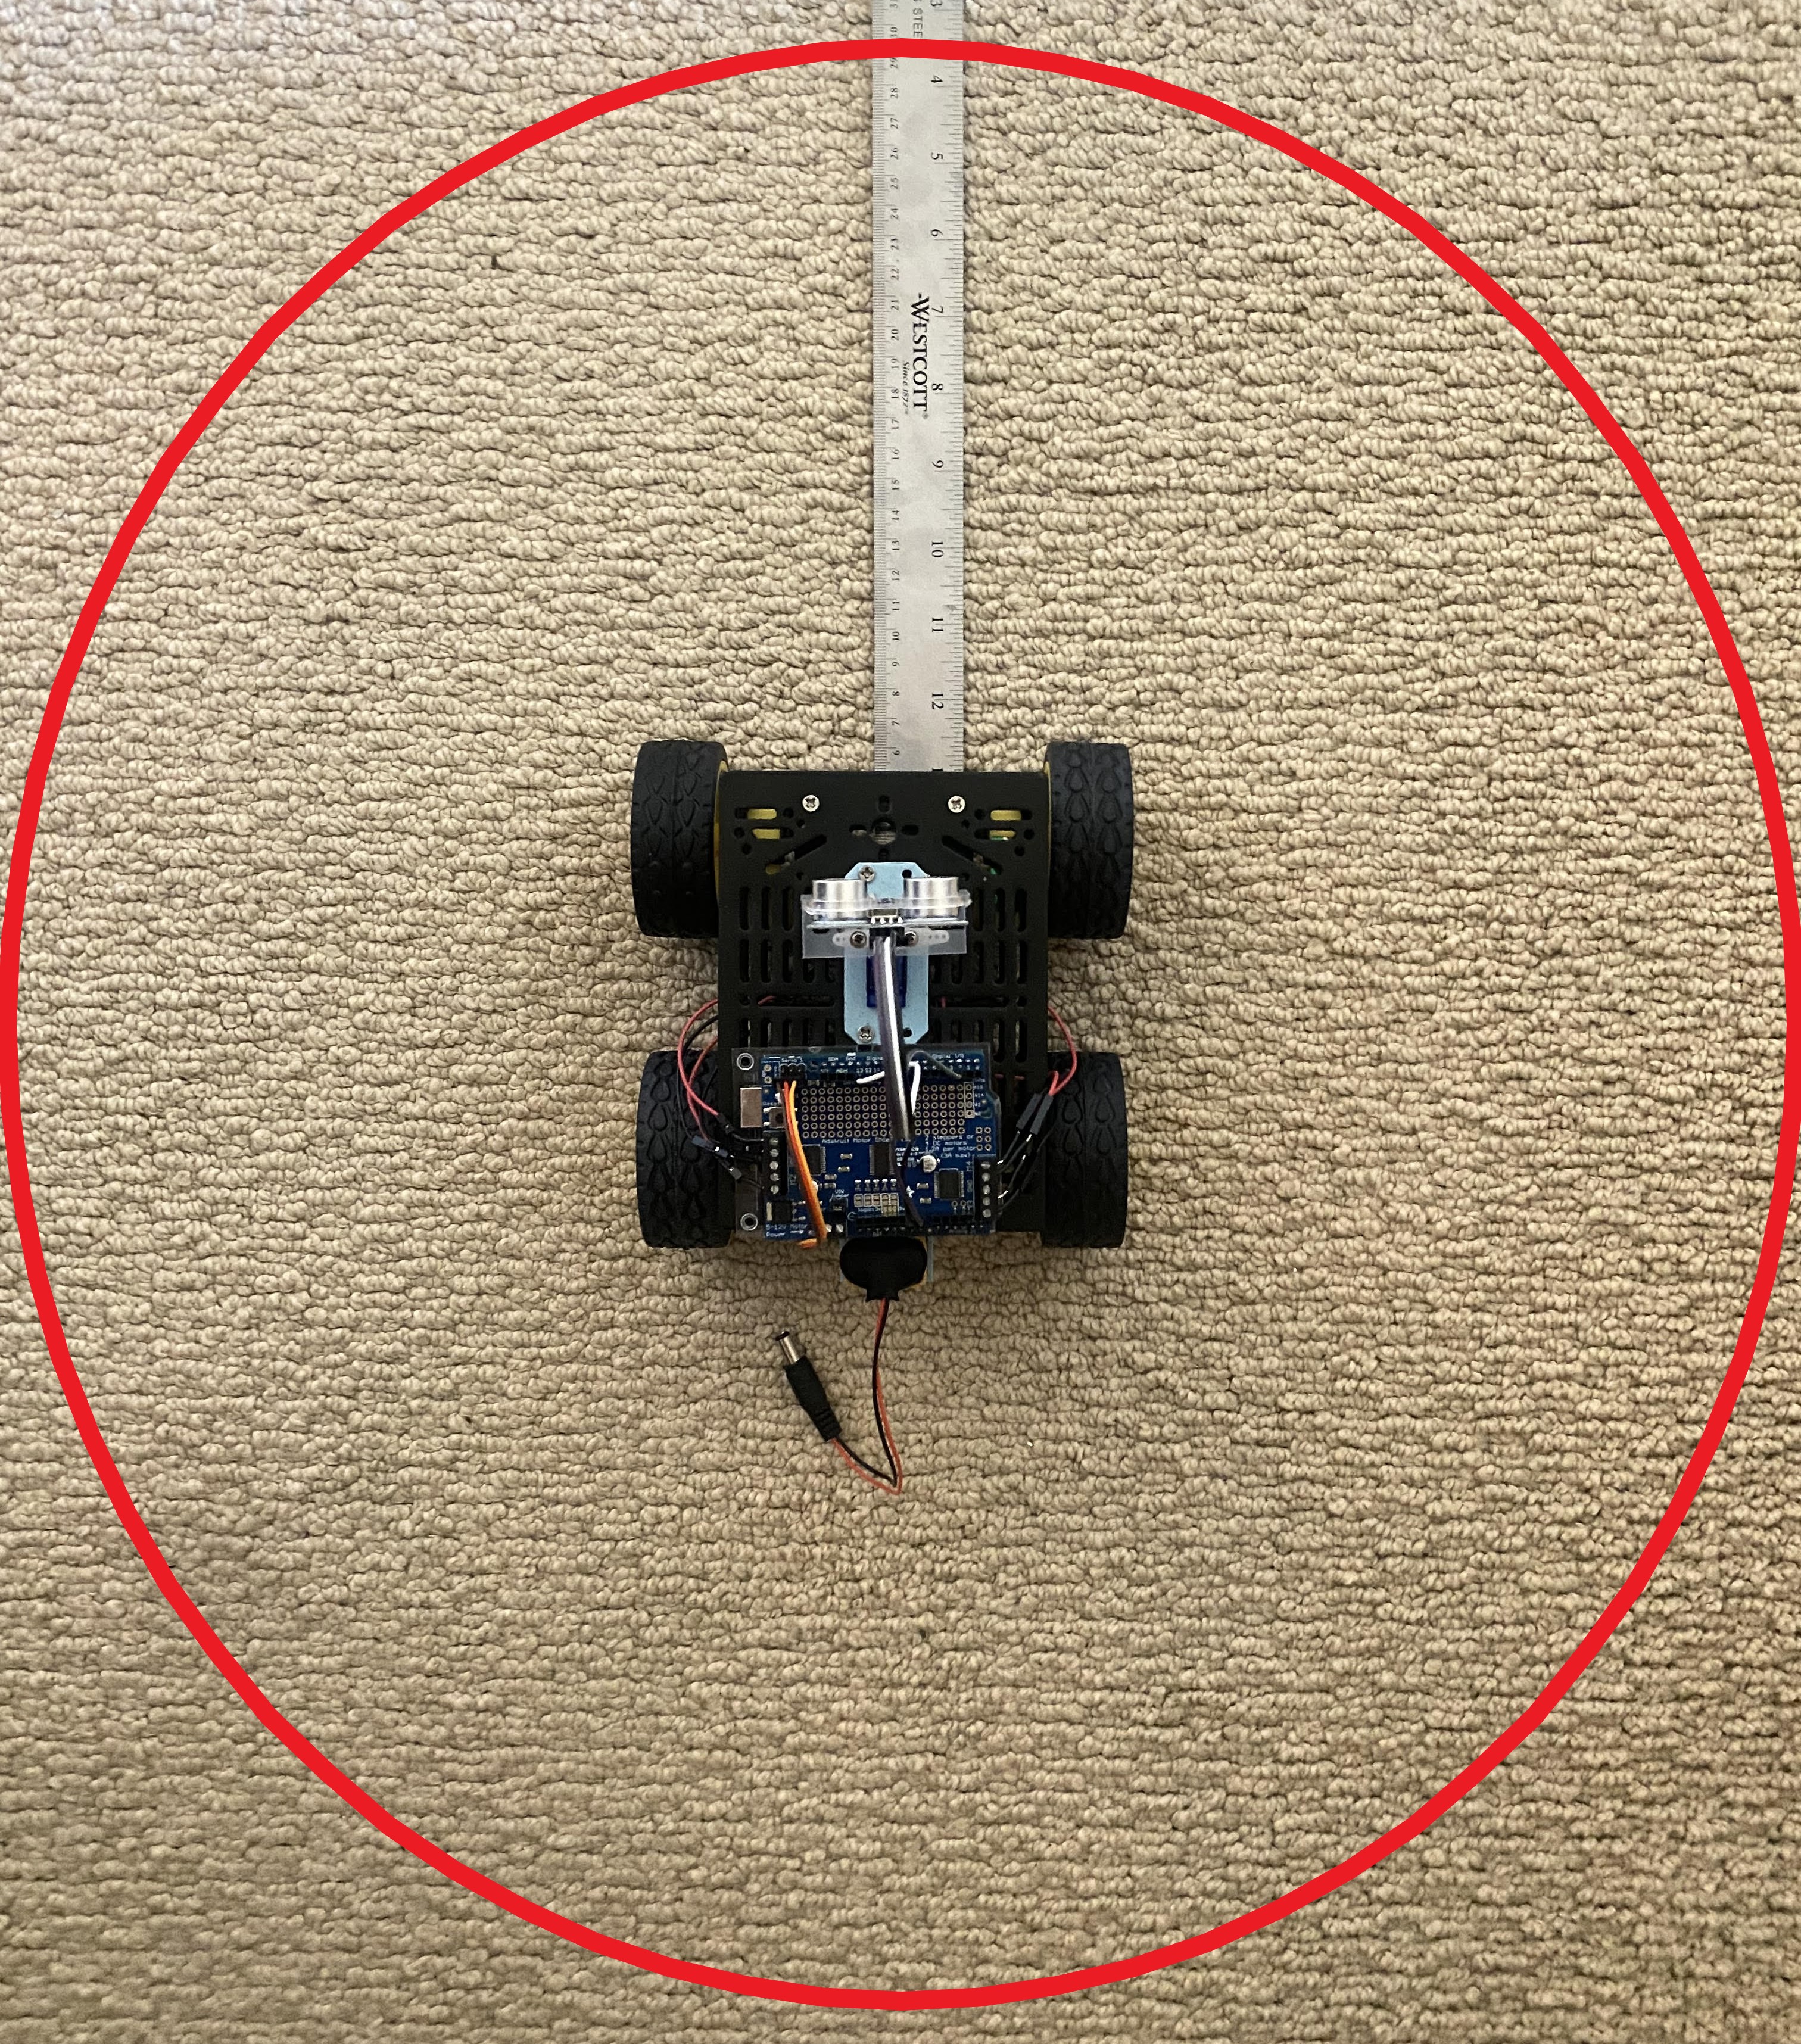
Typical Final Assembly of Robot (just to get an idea of where you’re headed):
Designing the chassis in SolidWorks:
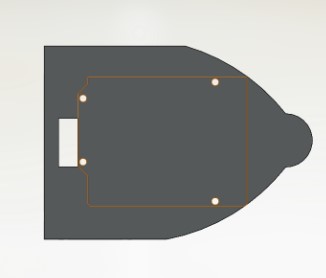
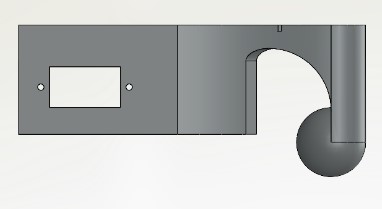
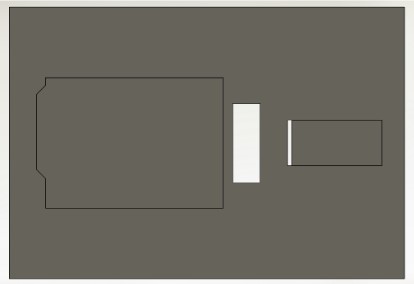
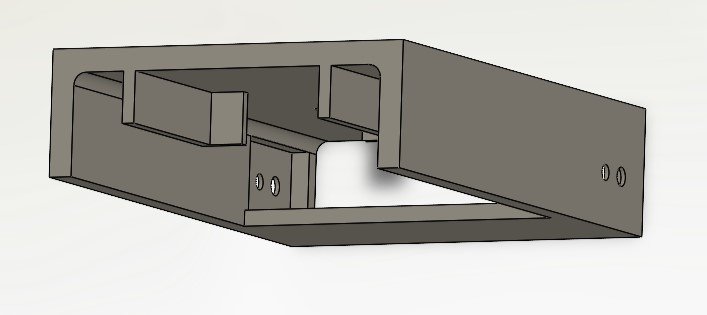
Depending on the type of drive system you want (2-wheel or 4-wheel drive), create a new SolidWorks part that will house your motor, micro servo, Arduino Uno, Adafruit Motor Shield, and battery pack.
Here are some examples that are NOT finished but may give you some ideas:
2-wheel continuous servo chassis (basic)
2-wheel larger chassis with battery storage
Arduino and Adafruit Motor Shield:
Refer to the official website for more detailed information
- Ensure you have the Arduino IDE installed
- In the IDE make sure you also install the library (Link to V2 library)
This is everything you will need to include in this project at the top of the Sketch:
#include <Adafruit_MotorShield.h>
#include "utility/Adafruit_MS_PWMServoDriver.h"
#include <Servo.h>
Driving the Motors
For this project, you have to learn to drive servo motors and/or dc motors. Luckily the Adafruit Motor shield makes it very simple to code because of the installed Arduino library. The below diagram shows the locations where you will connect your dc motors.
The direction of the motors will depend on the orientation of the wires connected to the motor shield.
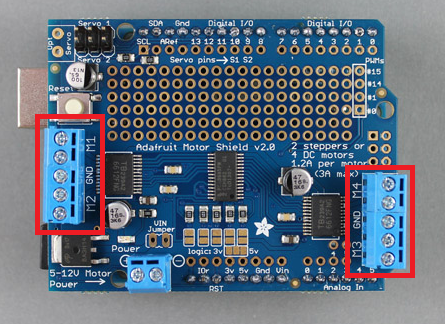
The code below shows how to initialize each motor you're using including the ultrasonic sweep servo. You can place this code block before the void setup.
Adafruit_MotorShield AFMS = Adafruit_MotorShield();  //Initializes Motor Shield

Adafruit_DCMotor *RFrontMotor = AFMS.getMotor(4);  //Each number corresponds to Motor Shield
Adafruit_DCMotor *RBackMotor = AFMS.getMotor(3);   //refer to diagram above
Adafruit_DCMotor *LBackMotor = AFMS.getMotor(2);
Adafruit_DCMotor *LFrontMotor = AFMS.getMotor(1);

Servo sweepServo;
In the setup block, you will want to set the default speed of the motors and attach the servo to a pin (9 or 10). The 'run' function described below is also how you will drive the dc motors (RELEASE, FORWARD, and BACKWARD). Servo 1 corresponds to pin value 9 and Servo 2 corresponds to pin value 10.
void setup()
{
  AFMS.begin();
  RFMotor->setSpeed(motorSpeed);        //Set motor speed value (70 to 90 should work)
  LFMotor->setSpeed(motorSpeed);
  RBMotor->setSpeed(motorSpeed);
  LBMotor->setSpeed(motorSpeed);

  RFMotor->run(RELEASE);                //Release all motors before void loop
  LFMotor->run(RELEASE);
  RBMotor->run(RELEASE);
  LBMotor->run(RELEASE);

  sweepServo.attach(10);               // Connect servo motor to pin 10 (Servo 2)
}
Ultrasonic Sensor
Ultrasonic sensors emit sound waves at a very high frequency that humans cannot hear. These sound waves bounce off of objects and return to the sensor where a distance can be calculated based on the time it took the sound wave to return to the sensor.
For a bit more information about ultrasonic sensors and how to implement them with Arduino check out this article.
Sweep Function
The ultimate goal of the ultrasonic sensor sweep function is to first detect an object in front of the robot and then determine the best direction for the robot to proceed forward in. Thus when an object is detected within the safe space of the robot:
Sweep Function Test
Use this section to test out how to code the ultrasonic sensor and implement it with the Arduino and micro servo. The annotated code below shows which pins to connect to on the board (ensure the VCC pin is connected to 5V) as well as how each block works.
// Blake Iwaisako
// 11 August 2022

#include <Servo.h>

Servo sweepServo;

const int trig = 12;  // Trig pin
const int echo = 13;  // Echo pin
int pos = 0;          // Initial position integer
long dur;             // Initialize long variables: duration of ultrasonic pulse
long tocm;            // microseconds to cm variable
bool returningToZero; // Create boolean for returning to zero

void setup() {
  Serial.begin(9600);        // Connect to serial monitor
  pinMode(echo, INPUT);      // echo pin corresponds to "echo" on Ultrasonic Sensor
  pinMode(trig, OUTPUT);     // "trig" pin on sensor
  sweepServo.attach(9);
  sweepServo.write(0);
}

bool objectDetected(long tocm)    // Create boolean to detect object
{
  if (tocm < 20)     // Any objects within 20 cm will be noticed
  {
    return true;
  } else {
    return false;
  }
}

void loop()
{
  digitalWrite(trig, LOW);    // Momentarily turns off trigger
  delayMicroseconds(2);
  digitalWrite(trig, HIGH);   // Turn on trigger to send a pulse for
  delayMicroseconds(10);      // 10 microseconds
  digitalWrite(trig, LOW);    // Turn off trigger
  dur = pulseIn(echo, HIGH);      // Records ultrasonic pulse via the echo pin
  tocm = microsecondsToCentimeters(dur);    // Determine in cm distance of object based on pulse duration
  if (objectDetected(tocm))       // If variable tocm is within 20 cm threshold
  {
    Serial.print("Object detected. Object's distance: ");   // This block prints out the distance of the detected object
    Serial.print(tocm);                                     // and the angle of the servo in which the object was found
    Serial.print(". Servo's angle: ");                      // this stops the servo from sweeping as long as the object is seen
    Serial.println(pos);
  } else {
    if (pos < 180 && returningToZero == false)    // This block rotates the servo in intervals of 10cm back and forth
    {
      sweepServo.write(pos);
      pos += 10;
      Serial.print("Searching for object. Servo's angle: ");
      Serial.println(pos);
      if (pos == 180)                   // When the servo reaches the maximum angle 180 it returns to zero
        returningToZero = true;
    } else if (returningToZero == true) {
      pos -= 10;
      Serial.print("Searching for object. Servo's angle: ");
      Serial.println(pos);
      sweepServo.write(pos);
      if (pos == 0)                    // When the servo reaches minimum angle it returns to zero
        returningToZero = false;
    }
  }
  delay(200);
}

long microsecondsToCentimeters(long microseconds)   // Converter for microseconds to cm
{
  return microseconds / 29.155 / 2;
}
Putting it All Together
Once the robot is assembled, the rest of the project mainly consists of writing code and troubleshooting.
Here is a complete annotated version of the code for you to refer to:
// Blake Iwaisako
// 1 August 2022

#include <Wire.h>
#include <Adafruit_MotorShield.h>
#include "utility/Adafruit_MS_PWMServoDriver.h"
#include <Servo.h>

Adafruit_MotorShield AFMS = Adafruit_MotorShield();

Adafruit_DCMotor *RFMotor = AFMS.getMotor(4);
Adafruit_DCMotor *LFMotor = AFMS.getMotor(1);
Adafruit_DCMotor *RBMotor = AFMS.getMotor(3);
Adafruit_DCMotor *LBMotor = AFMS.getMotor(2);

Servo sweepServo;

byte trig = 2;                                    //trigger pin
byte echo = 13;                                   //echo pin
byte maxDist = 150;                               //maximum distance for sensing (outside of this distance objects are ignored)
byte stopDist = 50;                               //closest distance to an object allowable
float timeOut = 2*(maxDist+10)/100/134*1000000;   //Max time to wait for return signal

byte motorSpeed = 70;                             //Max motor speed (do not exceed 70)
byte motorOffset = 10;                            //Change to account for one motor being to powerful
int turnSpeed = 60;                               //Amount to add to motor during turns


void setup() {
  AFMS.begin();
  RFMotor->setSpeed(motorSpeed);                   //Set motor speed
  LFMotor->setSpeed(motorSpeed);
  RBMotor->setSpeed(motorSpeed);
  LBMotor->setSpeed(motorSpeed);

  RFMotor->run(RELEASE);                            //Release all motors before loop
  LFMotor->run(RELEASE);
  RBMotor->run(RELEASE);
  LBMotor->run(RELEASE);

  pinMode(trig, OUTPUT);
  pinMode(echo, INPUT);

  sweepServo.attach(10);
}

void loop()
{
  sweepServo.write(90);                             //Set servo to look straight ahead

  delay(500);
  int distance = getDistance();                     //check for objects directly ahead
  if(distance >= stopDist)                          //if there are no objects within the stopping distance, move forward
  {
    moveForward();
  }
  while(distance >= stopDist)                       //keep checking the object distance until it is within the minimum stopping distance
  {
    distance = getDistance();
    delay(250);
  }
  stopMove();                                       //stop the motors
  int turnDir = checkDirection();                   //check the left and right object distances and get the turning instruction
  Serial.print(turnDir);
  switch (turnDir)                                  //turn left, turn around or turn right depending on the instruction
  {
    case 0:                                         //turn left
      turnLeft(1000);
      break;
    case 1:
      turnLeft(2000);                                //turn around
      break;
    case 2:
      turnRight(1000);                               //turn right
      break;
  }
}

//create functions for movement and scanning

void accelerate()                                   //function to accelerate motors from 0 to full speed
{
  for (int i=0; i<motorSpeed; i++)
  {
    RFMotor->setSpeed(i);
    LFMotor->setSpeed(i);
    RBMotor->setSpeed(i);
    LBMotor->setSpeed(i);
    delay(10);
  }
}

void decelerate()                                     //function to decelerate motors from full speed to zero
{
  for(int i=motorSpeed; i!=0; i--)
  {
    RFMotor->setSpeed(i);
    LFMotor->setSpeed(i);
    RBMotor->setSpeed(i);
    LBMotor->setSpeed(i);
    delay(10);

  }
}

void moveForward()                                     //set all motors to run FORWARD
{
  RFMotor->run(FORWARD);
  LFMotor->run(FORWARD);
  RBMotor->run(FORWARD);
  LBMotor->run(FORWARD);
}

void stopMove()                                        //set all motors to stop
{
  RFMotor->run(RELEASE);
  LFMotor->run(RELEASE);
  RBMotor->run(RELEASE);
  LBMotor->run(RELEASE);
}

void turnLeft(int duration)                           //set motors to turn left for a certain duration variable
{
  RFMotor->setSpeed(motorSpeed+turnSpeed);            //set motors to turning speed
  LFMotor->setSpeed(motorSpeed+turnSpeed);
  RBMotor->setSpeed(motorSpeed+turnSpeed);
  LBMotor->setSpeed(motorSpeed+turnSpeed);
  RFMotor->run(FORWARD);
  RBMotor->run(FORWARD);
  LFMotor->run(BACKWARD);
  LBMotor->run(BACKWARD);
  delay(duration);
  RFMotor->setSpeed(motorSpeed);                      //bring back to motor speed
  LFMotor->setSpeed(motorSpeed);
  RBMotor->setSpeed(motorSpeed);
  LBMotor->setSpeed(motorSpeed);
  RFMotor->run(RELEASE);
  LFMotor->run(RELEASE);
  RBMotor->run(RELEASE);
  LBMotor->run(RELEASE);
}

void turnRight(int duration)
{
  RFMotor->setSpeed(motorSpeed+turnSpeed);
  LFMotor->setSpeed(motorSpeed+turnSpeed);
  RBMotor->setSpeed(motorSpeed+turnSpeed);
  LBMotor->setSpeed(motorSpeed+turnSpeed);
  RFMotor->run(BACKWARD);
  RBMotor->run(BACKWARD);
  LFMotor->run(FORWARD);
  LBMotor->run(FORWARD);
  delay(duration);
  RFMotor->setSpeed(motorSpeed);
  LFMotor->setSpeed(motorSpeed);
  RBMotor->setSpeed(motorSpeed);
  LBMotor->setSpeed(motorSpeed);
  RFMotor->run(RELEASE);
  LFMotor->run(RELEASE);
  RBMotor->run(RELEASE);
  LBMotor->run(RELEASE);
}

int getDistance()                                       // use snesor to measure distance to an object
{
  unsigned long pulseTime;                              // variable stores pulse travel time
  int distance;                                         // create a variable to store the calculated distance
  digitalWrite(trig, HIGH);                             // generate a 10 microsecond pulse
  delayMicroseconds(10);
  digitalWrite(trig, LOW);
  pulseTime = pulseIn(echo, HIGH, timeOut);             // measure time for pulse to return
  distance = (float)pulseTime * 340 / 2 / 10000;        // calculate the object distance on the pulse time
  return distance;
}

int checkDirection()                                    // check the left and right directions and decide which way to turn
{
  int distances [2] = {0,0};                            // Left and Right distances
  int turnDir = 1;                                      // direction to turn, 0 Left, 1 Reverse, 2 Right
  sweepServo.write(180);                                // turn servo to look Left
  delay(500);
  distances [0] = getDistance();                        // get the left object distance
  sweepServo.write(0);                                  // turn servo to look right
  delay(1000);
  distances [1] = getDistance();                        // get the right object distance
  if (distances[0] >= 200 && distances[1] >= 200)       // if both directions are clear, turn left
    turnDir = 0;
  else if (distances[0] <= stopDist && distances[1]<=stopDist)  // if both directions are blocked, turn around
    turnDir = 1;
  else if (distances[0] >= distances[1])                 // if left has more space, turn left
    turnDir = 0;
  else if (distances[0]<distances[1])                    // if right has more space, turn right
    turnDir = 2;
  return turnDir;
}