Double Action Out the Front Comb
About
This is a 3d printed out the front mechanism. This mechanism is extremely common on fancy knives, part of the aspect of this project was to reverse engineer it to figure out how it works. A good way to learn how something works is to design and make it from scratch!

Careful, this action is addictive.
Do not make a weapon. You will be banned from Envision!!!
Materials
Large Spring and Small Spring
- Large spring = 0.8" Long x 1/4" OD
- Small spring = .17" Long x .15" OD
4x M3 x 6 Bolts
How it works
If you want a visualization go to the assembly and change the configurations. You can hide parts with 'Y' on the keyboard
There are two states, retracted and extended. The mechanism works the exact same why for both cases.
A locking pawl locks the comb in either the extended or the retracted position
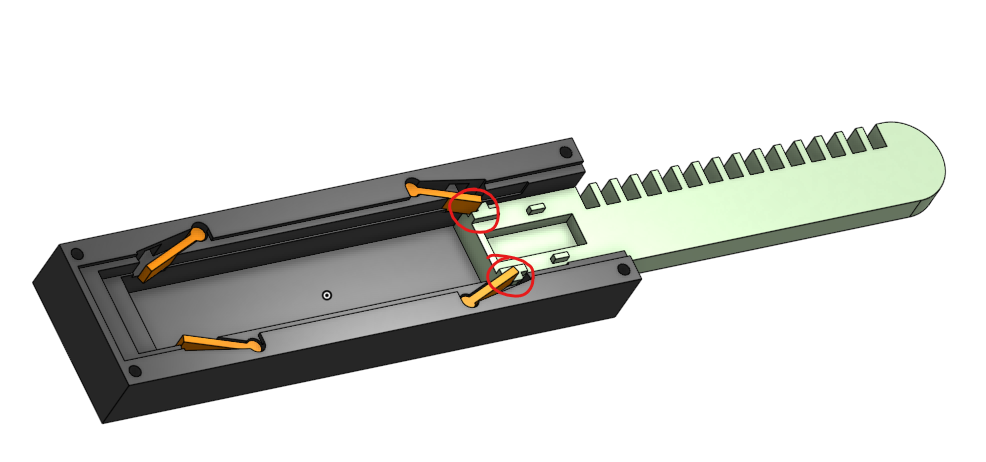
As you are moving the trigger slider, you are building up spring pressure in the spring in the comb. Simultaneously, you will retract the locking pawl after enough spring pressure is built, releasing all that energy in the comb.
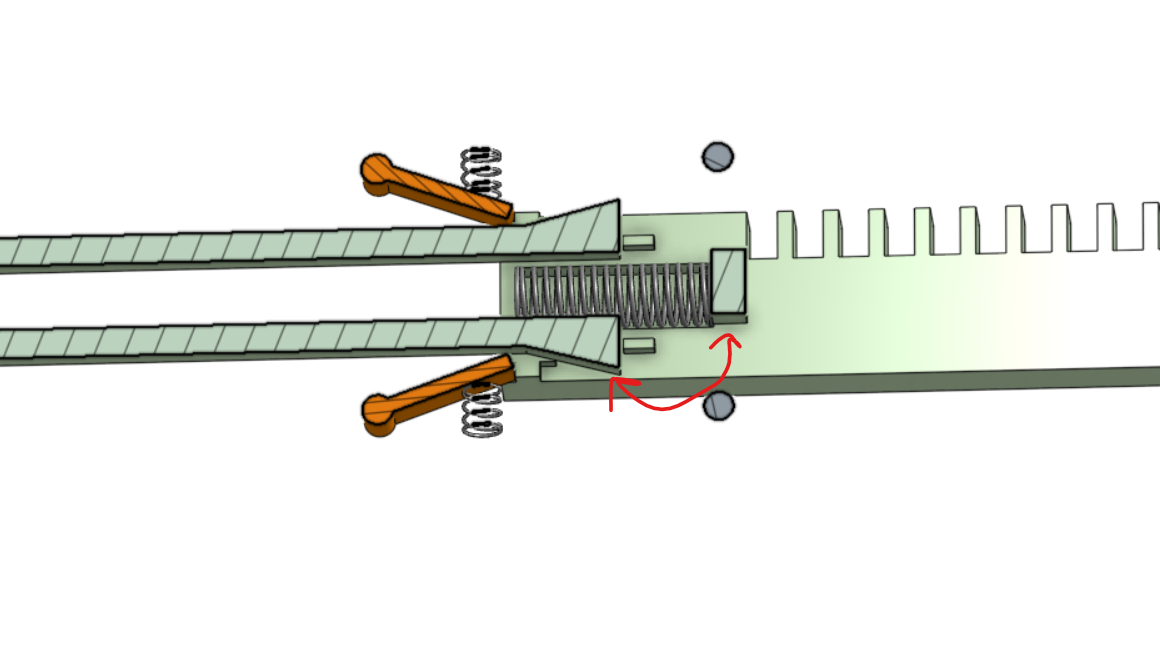
Shaded part represents the trigger slider
Notice that the arrow points to two shaded pieces, these are ONE part. As you move the trigger slider back, you charge up the spring, and eventually the flanges retract the pawl back into the body and send the comb flying back.
Designing your comb
- Click on the OnShape link at the top of the page and make a Copy of it into your account so that you can edit it
- In the part studio where the main parts are, scroll down to the very bottom and edit the sketch that says "EDIT ME"
- So that the mechanism still works properly, design your comb so that it fits within those construction lines
Assembling your comb
Behind starting, ensure that the Comb slides smoothly inside of the Main Body. Literally 0 friction is necessary for this to actually work.
- Insert small spring into cavity behind each orange part called the "Latch Spring"
- Insert the Latch Springs into the Main Body so that they are spring loaded because of those small pen springs
- Repeat for all 4 Latch Springs
- Insert Comb into mechanism. Ensure it locks at both extremes, though it will only be constrained in the extended position by the Top Lid (which we haven't added on yet)
- Put the bigger Pen Spring inside of the Cutout in the comb
- Lay on the Trigger Slider
- Ensure the mechanism functions as it should by sliding the Trigger Slider back and forth
- Put on the Top Lid and screw it down with M3 Bolts.